How many times has this happened to you? You go to the store and bring back one of those wands full of bubbles or, even better, one of those bubble blowers that blows something crazy like 500 bubbles per second. About five minutes into the bubble fun, your dear child has dropped the solution all over the floor, or that bubble blower has already blown through all the bubbles. Now you have an empty bubble container and a disappointed child. Well you don’t have to go run back to the store to get more bubbles! You can make them in just a few minutes with materials that you already have around your house, and you can even substitute materials that you don’t have if you know how those bubble solutions work in the first place.
So how DO they work?
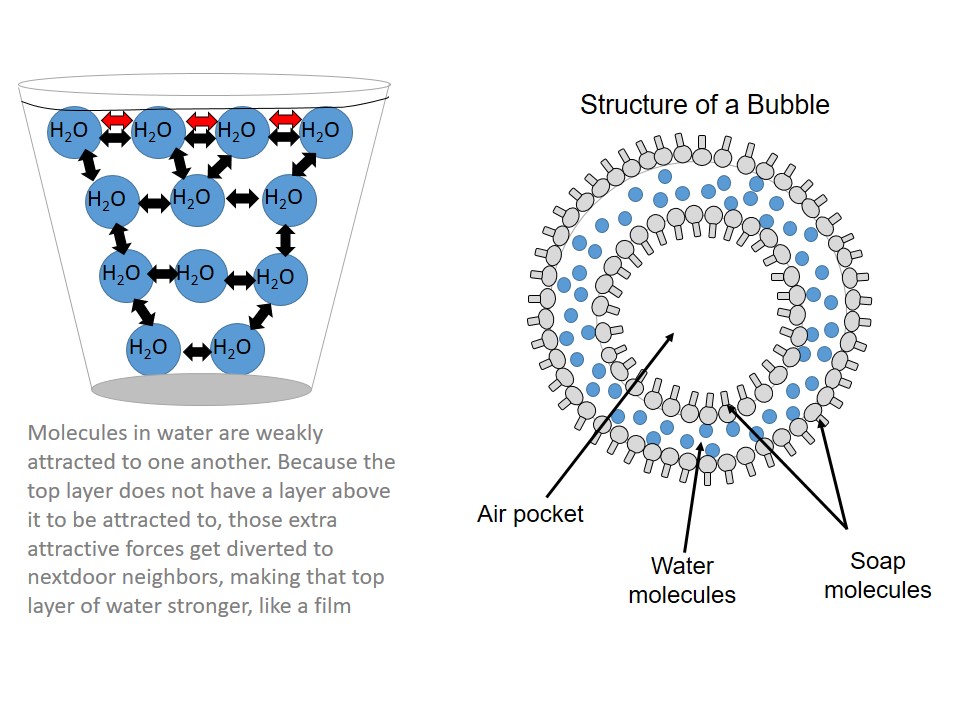
Water has what’s called a surface tension. Surface tension happens because water molecules are attracted to one another. In a glass of water, the molecules at the surface don’t have additional molecules above them, so they stick together extra tight to form what seems like a sheet that holds the water together. When you look at a water droplet, surface tension keeps that droplet from spreading out, holding it instead like a ball wrapped in very thin film. For the same reason, if you place a paper clip in a glass of water, it will appear to float on that top surface layer. Cue the first ingredient of most bubble solutions: soap or detergent. If you touch a Q-tip with dish soap to the surface of the water in the glass, the tension will break and the paper clip will fall. The soap molecules wedge themselves in between the water molecules, which allows them to spread out. When you form a bubble, the water actually wraps around a pocket of air, and the soap holds the water in place by making a layer on either side of it. All of these layers together are merely millionths of an inch thick! See below for the structure of a bubble:
What do I need to make REALLY good bubbles?
You can make some ok bubbles using dish detergent and water, but you’ll likely find that they don’t last all that long before they dry out and pop. That’s because the reason a bubble pops is because some part of it has dried.
Take home message: Drying = Bubble Death!
But if you add another ingredient, something that bind to the water, you can slow the evaporation time waaaay down. Cue the next ingredient: a polymer! A polymer is just a molecule that is made up of many single units, or monomers. There are likely many of these sitting in your own kitchen, like glue, or corn syrup, for example. These polymer molecules tend to be nice and sticky, so when you add them to your bubble solution, the polymer molecules will bond to your water molecules, and that will make it harder for the water to evaporate. The result? Bubbles that stay wet and last a nice long time! Here are some common polymers that people add to bubble solutions:
- Glycerin – this is one of the prime ingredients in your bars of soap. You can find it in the pharmacy and sometimes in the hobby section of a store. Look for the bottle of clear liquid glycerin.
- Corn Syrup – This is the food syrup made from the starch of corn. It can be found in any supermarket, usually in the aisle with the pancakes and maple syrup.
- Other Starches – instead of using laundry starch, which could be abrasive to the eyes, try corn starch, which is not pure polymer, but has enough to make the bubbles last longer.
- Vegetable oil – actually, this is not a polymer! It has the same effect, though, and helps to bind the water to keep bubbles wet. I actually used this by mistake when making my own bubble solution for the first time, because I misread “corn syrup” as “corn oil”, and I didn’t have that, so I used vegetable oil. It made great bubbles! I later found out that it’s an ingredient that others use too!
All of these substances will help to make bubbles last for a much longer time, as long as they don’t touch anything dry. Usually, bubbles dry when we touch them because our hands are dry. But if we touch the bubbles with something wet, the bubbles don’t pop! I like to blow bubbles with my kids in the bath or pool, because then the kids can manipulate the bubbles with their wet hands without popping them! You can also do a “magic” trick using a table and a wet straw. If you wet a table surface and use a straw to blow a big bubble on it, you can then rewet the straw and pass it through the surface of the bubble without popping it. You can then blow another bubble inside the first bubble, and then another, and then another. My kids spent hours playing with this, and anything that keeps kids busy for hours is true magic in my book. Watch the video below to see this in action!
Can I make bubbles more colorful?
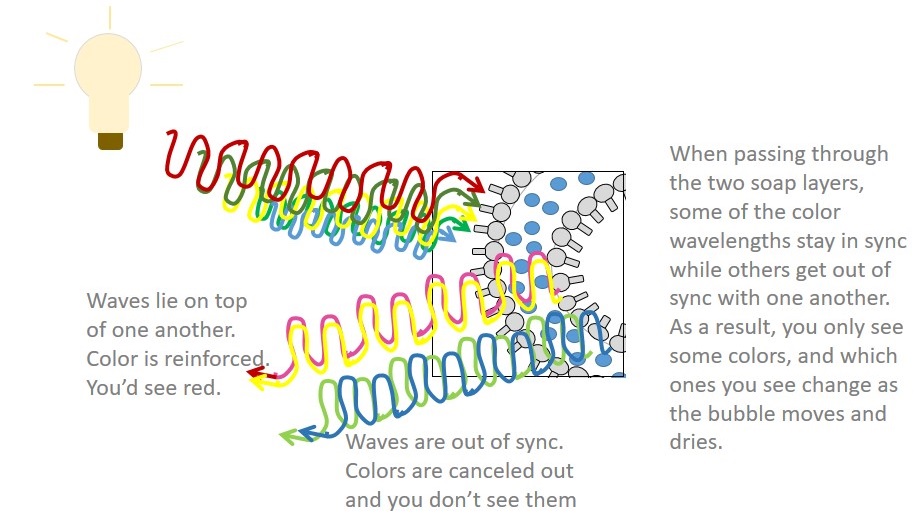
Have you ever noticed that some bubbles are beautifully colored like the rainbow, while others are more of a solid color, or not colorful at all? The color of bubbles is caused by the actions of light waves. What we see as white light is actually made up of all of the colors of the rainbow, and these colors are actually energy that travels in waves. When these light waves pass through the two soap layers of the bubble, some stay in sync with each other, which reinforces those colors and even changes the colors you see, while the waves of other colors are out of sync, and that cancels out the colors completely. As the bubble moves and dries, which wavelengths of light you see changes.
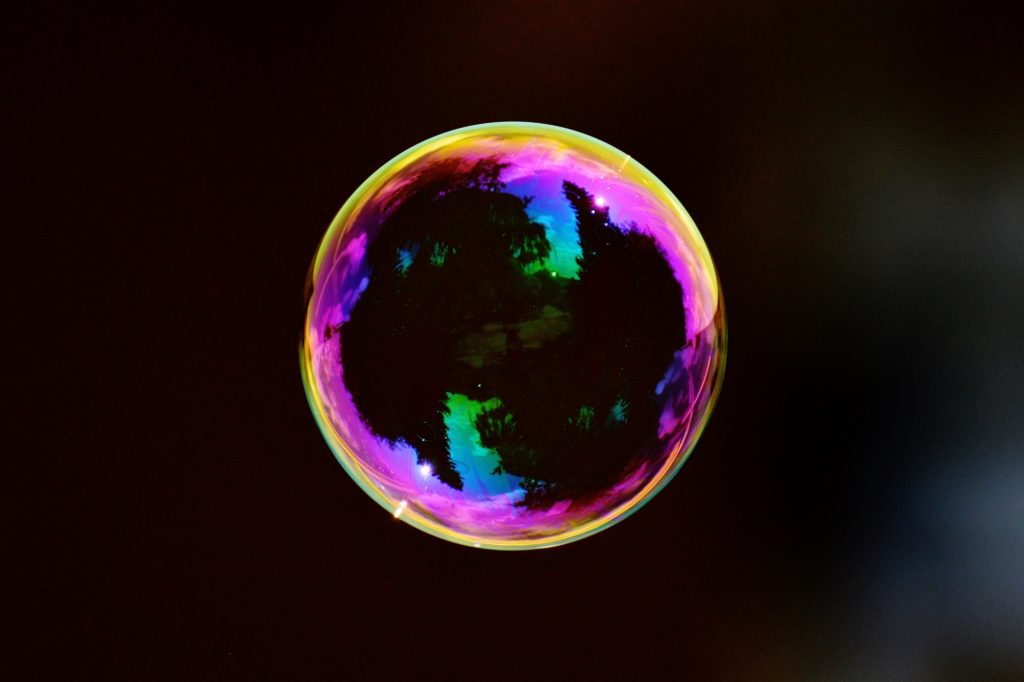
If you want to see the most colorful bubbles, it is best to blow them in a place with bright white light or sunlight, and you’ll see the colors best against a black back drop. Also, the colors are more dynamic when the soap layers in the bubble are far apart, so smaller bubbles will usually have more color than very large ones. You can change the colors of the bubbles by blowing on them, because that puff of air changes the thickess of the soap layer. Of course, you can also make bubbles colorful artificially. All you have to do is add some food coloring to the bubbles to make them tinted. If you want bubbles that will glow under a black light, you can add some tonic water, which naturally glows, or break open a yellow, pink, or orange highlighter (blue doesn’t work) and squeeze the ink into the bubble solution. Turn on a black light, blow some bubbles, and voila! Glowing bubbles!
Bubbles are great for keeping kids busy, but they can also learn science while making their own solutions, and manipulating those bubbles. And for all of you parents who find yourselves with an empty bubble container and a disappointed child, grab the dish soap and the corn syrup from the kitchen cabinet, and you can quickly become the hero of the day.
Need an impromptu bubble wand? You can use a straw! Just cut the ends of the straw to fan them out and blow through the straw to make bubbles!
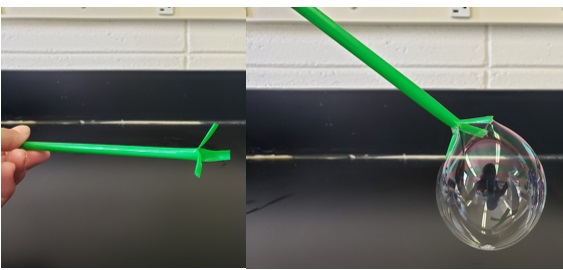
Just for fun, check out this cool experiment that can help demonstrate the concept of surface tension!
